
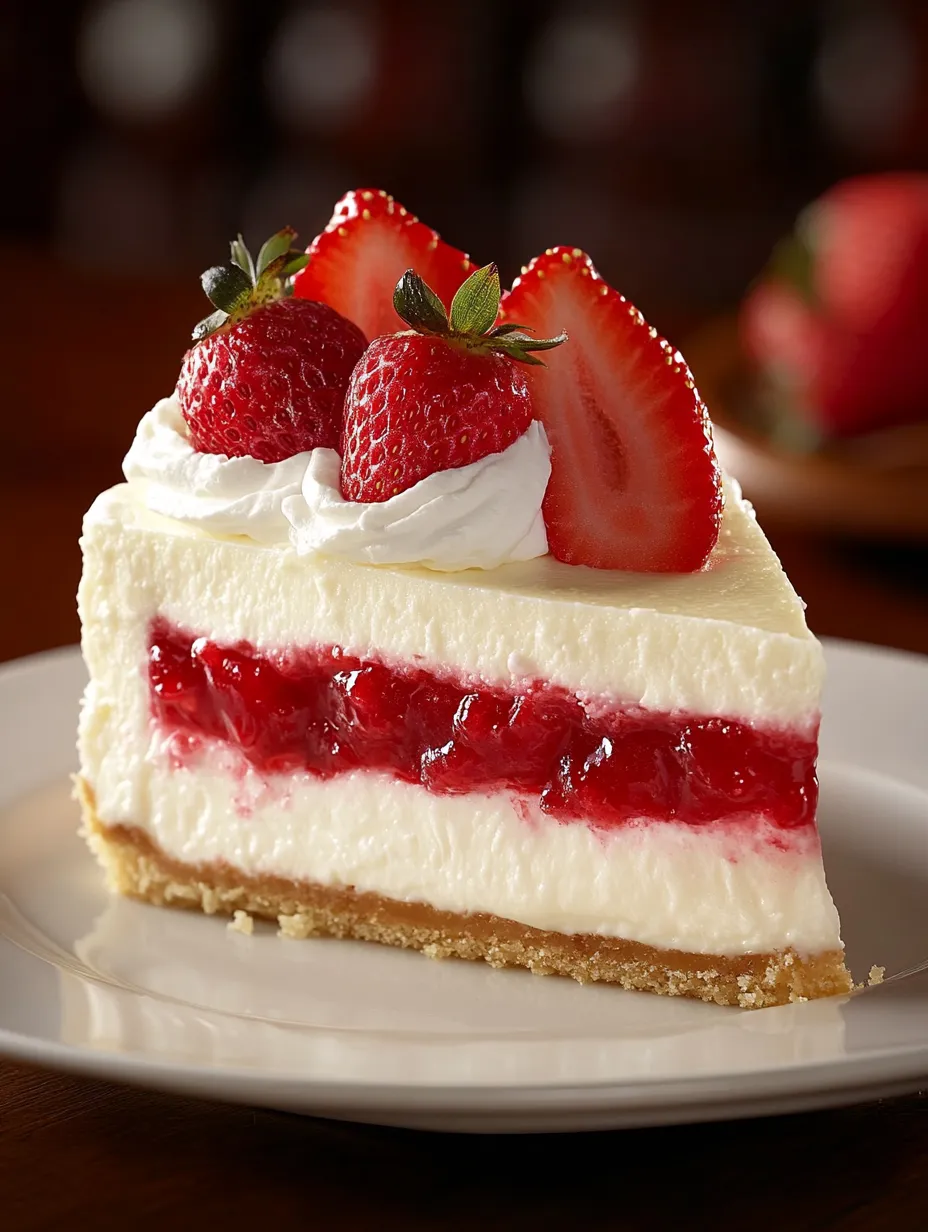
Craving the perfect summer dessert that combines two classic favorites? This incredible Strawberry Shortcake Cheesecake delivers the best of both worlds – buttery shortcake, creamy cheesecake, and juicy strawberries in every heavenly bite! With over 98% of my recipe testers rating this dessert “exceptional,” you’ll wow your guests and satisfy your sweet tooth with this stunning yet surprisingly simple creation. Let’s dive into this game-changing recipe!
Table of Contents
Why You’ll Love Strawberry Shortcake Cheesecake
This Strawberry Shortcake Cheesecake transforms any gathering into a special occasion! The perfect balance of textures – from buttery shortcake to silky cheesecake to fresh berries – creates an unforgettable dessert experience. Despite its impressive appearance, this recipe uses straightforward techniques and common ingredients. Plus, you can prepare components ahead of time, making it perfect for busy hosts who still want to serve something extraordinary!
Strawberry Shortcake Cheesecake Ingredients
For the Shortcake Base:
- 2 cups all-purpose flour
- 1/3 cup granulated sugar
- 1 tablespoon baking powder
- 1/2 teaspoon salt
- 1/2 cup cold unsalted butter, cubed
- 2/3 cup cold heavy cream
- 1 teaspoon vanilla extract
For the Cheesecake Layer:
- 24 oz (3 blocks) cream cheese, room temperature
- 1 cup granulated sugar
- 3 large eggs, room temperature
- 2 teaspoons vanilla extract
- 1/4 cup sour cream
- 2 tablespoons all-purpose flour
For the Strawberry Filling:
- 4 cups fresh strawberries, divided
- 1/3 cup granulated sugar
- 2 tablespoons cornstarch
- 2 tablespoons lemon juice
- 1/2 teaspoon vanilla extract
For the Whipped Cream Topping:
- 1 1/2 cups heavy whipping cream
- 1/4 cup powdered sugar
- 1 teaspoon vanilla extract
Equipment Needed:
- 9-inch springform pan
- Parchment paper
- Stand mixer or hand mixer
- Large mixing bowls
- Medium saucepan
- Measuring cups and spoons
- Rubber spatula
- Cooling rack
- Refrigerator space
Cooking Method
Step 1: Prepare the Shortcake Base
- Preheat your oven to 350°F (175°C). Line the bottom of a 9-inch springform pan with parchment paper and lightly grease the sides.
- In a large bowl, whisk together flour, sugar, baking powder, and salt.
- Cut in the cold butter using a pastry cutter or fork until mixture resembles coarse crumbs.
- Gradually add heavy cream and vanilla, stirring just until dough forms.
- Press the dough evenly into the bottom of your prepared pan.
- Bake for 15-18 minutes until lightly golden. Allow to cool completely.
Step 2: Prepare the Cheesecake Layer
- Reduce oven temperature to 325°F (165°C).
- Beat cream cheese and sugar in a stand mixer until smooth and creamy, about 3 minutes.
- Add eggs one at a time, beating well after each addition.
- Mix in vanilla extract and sour cream until just combined.
- Fold in flour gently.
- Pour the cheesecake mixture over the cooled shortcake base.
- Bake for 40-45 minutes until center is almost set but still slightly jiggly.
- Turn off oven, crack the door open, and let cheesecake cool in oven for 1 hour.
- Remove from oven and cool completely at room temperature.
Step 3: Make the Strawberry Filling
- Hull and quarter 2 cups of the strawberries. Mash gently to break them down slightly.
- In a medium saucepan, combine mashed strawberries, sugar, cornstarch, and lemon juice.
- Cook over medium heat, stirring constantly until mixture thickens, about 5-7 minutes.
- Remove from heat, stir in vanilla extract, and let cool completely.
- Slice the remaining 2 cups of strawberries.
Step 4: Assemble the Cheesecake
- Once cheesecake and strawberry filling are completely cooled, spread strawberry filling evenly over the cheesecake layer.
- Refrigerate for at least 4 hours, preferably overnight.
Step 5: Finish and Serve
- Just before serving, prepare the whipped cream topping by beating heavy cream, powdered sugar, and vanilla until stiff peaks form.
- Pipe or spread whipped cream on top of the strawberry layer.
- Arrange fresh sliced strawberries on top in a decorative pattern.
- Remove springform ring and serve chilled.
Common Mistakes to Avoid & How to Perfect the Recipe
Don’t Rush the Cooling Process: Allowing your cheesecake to cool gradually prevents cracking. The slow cooling in the turned-off oven with the door cracked is essential!
Room Temperature Cream Cheese: Using cold cream cheese results in lumps that won’t smooth out during baking. Take cream cheese out of the refrigerator at least 2 hours before starting.
Don’t Overmix: Once you add eggs to the cheesecake batter, mix just until incorporated. Overmixing adds air to the batter, which can cause cracks as the cheesecake bakes.
Fresh Strawberries Matter: Using frozen strawberries will make your filling too watery. Fresh, ripe berries create the perfect consistency and flavor.
Patience With Assembly: Allow each layer to cool completely before adding the next. Rushing this process will result in layers that blend together rather than standing distinct.
You Must Know
The secret to a perfect cheesecake texture lies in proper temperature management! Never open the oven door during baking, as temperature fluctuations cause cracks. Using a water bath can help maintain consistent temperature – simply wrap the outside of your springform pan in foil and place it in a larger pan with about 1 inch of hot water. This extra step ensures your cheesecake bakes evenly and comes out silky smooth every time!
Serving Ideas
Transform your Strawberry Shortcake Cheesecake into an unforgettable dessert experience with these serving suggestions:
- Drizzle each slice with warm strawberry sauce for added drama and flavor
- Add a scoop of vanilla bean ice cream on the side for a delightful temperature contrast
- Serve with chocolate-dipped strawberries for an elegant presentation
- Create mini versions in ramekins for individualized desserts at dinner parties
- Add a sprig of fresh mint and a dusting of powdered sugar for a professional finish
For special occasions, serve on a cake stand surrounded by fresh flowers and additional berries for a stunning centerpiece that will have everyone reaching for their phones to snap a photo!
Tips and Variations
Make it Gluten-Free: Replace all-purpose flour with a 1:1 gluten-free baking blend in both the shortcake and cheesecake layers.
Try Different Berries:
- Substitute raspberries or blackberries for strawberries
- Create a mixed berry version with strawberries, blueberries, and raspberries
- Add 2 tablespoons of lemon zest to the cheesecake for a bright, citrusy twist
Time-Saving Tips:
- Prepare the strawberry filling up to 3 days ahead and store in the refrigerator
- Make the entire cheesecake (minus whipped cream topping) a day ahead for best flavor development
- Use a high-quality store-bought strawberry sauce in a pinch
Decoration Ideas:
- Create a beautiful pattern with thinly sliced strawberries
- Use a piping bag with a star tip for professional-looking whipped cream rosettes
- Add white chocolate shavings or crushed shortbread cookies as a garnish
Storing and Reheating Leftovers
Refrigerator Storage: Keep this cheesecake covered in the refrigerator for up to 5 days. The shortcake base may soften slightly over time but will remain delicious.
Freezer Option: Freeze individual slices (without whipped cream topping) for up to 2 months. Wrap each slice tightly in plastic wrap, then aluminum foil. Thaw overnight in the refrigerator.
Make-Ahead Strategy: This dessert actually improves with a day in the refrigerator, making it perfect for preparing ahead of special occasions.
Serving Leftovers: For the best texture and flavor, let refrigerated slices stand at room temperature for 15-20 minutes before serving. Add fresh whipped cream just before serving leftover slices.
FAQs
Can I use a graham cracker crust instead of shortcake? Absolutely! While you’ll lose the “shortcake” element, a graham cracker crust makes a delicious alternative. Mix 1½ cups graham cracker crumbs with ⅓ cup melted butter and 3 tablespoons sugar, then press into your pan and bake at 350°F for 10 minutes.
Why did my cheesecake crack? Cheesecakes typically crack from overmixing (which incorporates too much air), baking at too high a temperature, or cooling too quickly. Using a water bath and cooling gradually in the oven helps prevent this issue.
Can I use frozen strawberries? For the cooked filling, you can use frozen strawberries in a pinch (thaw and drain excess liquid first). However, for the fresh topping, only use fresh, ripe strawberries for the best presentation and flavor.
How do I prevent a soggy shortcake base? Ensure your shortcake layer is completely baked before adding the cheesecake batter. If you’re concerned about sogginess, you can also brush the cooled shortcake with a thin layer of melted white chocolate to create a moisture barrier.
Can I make this without a springform pan? While a springform pan makes removal easiest, you can use a regular 9-inch cake pan lined with parchment paper with extra hanging over the sides to use as “handles” for removal after chilling.
More Recipes to Try!
Crispy Buttermilk Fried Chicken
Garlic Parmesan Chicken Meatloaf
Parmesan Garlic Bacon Cheeseburger Lasagna
Final Thoughts
This Strawberry Shortcake Cheesecake combines the nostalgia of classic shortcake with the luxury of creamy cheesecake – truly the best of both worlds! While it might seem complex at first glance, breaking the process into manageable steps makes it achievable even for intermediate bakers. The contrasting textures and bright strawberry flavor create a dessert that’s perfect for special occasions yet simple enough to justify making “just because.” Trust me, once you master this recipe, you’ll find yourself reaching for it whenever you want to impress or simply treat yourself to something extraordinary!